Loading... Please wait...


I'm new! I'm looking for a trainer kite...
I'm looking for a beginner, entry-level power kite for...
I'm looking for a board...
- Home
- Snowkite
- Learning Center
- Learn About Snow-Kiting

Categories
Shop by Price
Brands
Current Top Sellers
-
$279.00

-
$389.99$379.99
-
 $349.99
-
$348.50$345.50
-
$229.99$218.49
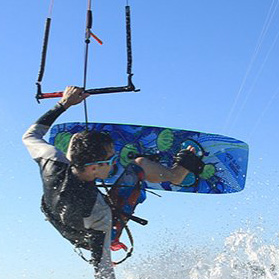
Learn About Snow-Kiting

Learning Snow-Kiting - Its Easy, Fun, and Affordable
If you live in snow country you can turn a frozen lake or farm field into a snow kiting wonder land.
- Find an easy and safe kite to use
- Watch a good instructional dvd,
- Build some good fundamental kite flying skills.
- Use a smaller kite to begin with. Put on a pair of skis or a snow board and go...
How To Snow Kite DVD
This is the best training DVD that we've found that explains in detail how to snow-kite and the different types of kites, boards, skis, and riding styles used for snow-kiting. There is no other DVD like it! It's a 2 hour complete and extremely thorough video presentation.
Types of Kites Used for Snow-Kiting
1 .Standard Fixed-Bridal Foil Kites
Example: HQ Scout
- These can be 2-line, 3-line, or 4-line kites
- The Most popular are the Hq Scout or for lighter riders HQ Rush V Pro 3-line kites
- Foils are designed for land-based sports. They are easy to Fly.
- No pump required and Come complete and ready to fly.
- Foils can still fly well even with a small rip or hole.
2. Traditional foil kites that are rigged with 3-lines on a control bar.
The 3-line kite mainly flies using the kite's 2 front lines that connect to the outer ends of the control bar. The back lines (aka brake lines / back lines / rear Lines) are mostly slack while the kite is flying.
The brake lines / aka back line(s) adds 2 advantages:
- Quick and easy set up.
- These lines allow the kite to be easily "reversed" relaunched off the ground after a nose first crash.
- These lines are also used as a safety kill switch. Just release the bar, and the brake line(s) tighten up causing the kite "over-sheet" to lose power, and fall to the ground.
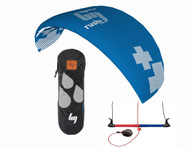
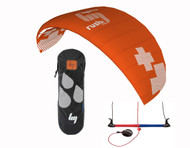
3. Sheetable (aka Depowerable ) Foils
 Examples: HQ Apex v or Flysurfer Peak3
The ultimate kite design for most snow-kiters.
All of the benefits of a foil:
- instant inflate
- no pump needed
- greater durability
- small pack down size
Plus, the full sheeting (instant depower) ability and the advantages of an inflatable!
The snow-kiter gets the best of both worlds! The wind range on these kites allows one kite to handle the wind range of at least 2 standard foils. These kites are amazing!
Qualities:
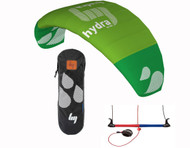
4. Sheetable Closed-Cell Foil-Kites ( Water Relaunchable / Amphibious )
Example: Flysurfer Viron 2v
These are Sheetable-foil kites, but rather than the common "open-cell"
they use "closed-cells" with one-way air-intake-valves along the leading (front) edge
that allows the air flow-in and become trapped inside.
The kites inflate and stay inflated from only the wind natually flowing in.
No Air-pump needed. When used on the water, the trapped air allows the kite float , and thus become "Water-Relaunchable".
5. Inflatable Kites ( also called: Tube kites, SLE, Bow )

Inflatable kites were designed for the water but also work well on the snow.
Kite companies have been making their inflatables kites: tougher in the right places, easier to relaunch, more de-powerable, and safer.
The majority of snow-kiters use foil kites, but some prefer their inflatables for both water and snow.
Inflatable Qualities:
(+) Excellent wind range.
(+) Kiteboarders already own one.
(+) Line configuration is simple compared to foil kites.
(+) Rigid Air Frame adds stability
(-) They need a good amount of internal air pressure to keep their shape.
(-) You'll need to carry an air-pump.
(-) Mass. An inflatable kite is always full of air. Open-cell Foils are the opposite since they self-deflate when on the ground.
In short: Ideal for the water, and also be fun on the snow.
 Understanding Line Configurations
All Inflatable Kites are Sheetable
Some Foil kites are Sheetable, and other foil kites are Not.
Having 4-line, does NOT mean that a kite is sheetable.
Think of "Sheet-ability" like a sailboat sail that can adjust the angle of the sail
to the wind. ( Trimming the sail ).
Speaking for the moment about "Sheet-able" kites ( foils and inflatable types )
The Front-Lines...connected to the kites front which is called its "Leading edge" (LE)
The Front lines from the kite pass through a hole in the center of the Control-bar
and terminate into the "trim-loop" ( aka Chicken-Loop) that hooks directly to your body via your harness.
The Back-Lines. connect to the outer ends of the Control-Bar.
The back lines ( on a sheetable kite) are also called "Steering lines" or "Brake Lines".
When pulling on "one side" of your Control-bar. (the right side for example),
the right line pulls tighter, and creates more drag on the right wing-tip slowing it down.The kite then rotates around that point, causing your kite to steer ( turn ) to the right.
IF.. "Both" Back-Lines are pulled and tighten at the same time...
You will be slowing down the kite equally on both sides. ( called Braking).
Initially you will feel more power from your kite. If you continue to pull both back lines, your kite will reach a point in which its angle to the wind is excessive, and it will cause your kite to stall and lose power.
Inflatable kite fliers like to call it "back stalling" because it causes the kite to
slow down, stop, and then go into reverse.
IF you see your kite or someone else's kite not wanting to launch, not wanting to climb in the sky, or appearing to want to fly back-wards... you'll now understand that it's mostly due to too much back line tension. ( too much brake) The problem is normally NOT the kite, but rather the fault of the kites owner not having the kite tuned (adjusted ) properly.
Your back-lines should have some slack when flying normally.
Too tight ( braking) and your kite will lose lift and stall.
Too loose, and your steering will be sloppy or non-effective.
As you sheet-out (slacken the back lines), you allow the kite to open more.
Sheet-out for less-power.
Sometimes people find that sheeting-out has the opposite effect than what's
expected.
IF.... your kite is powered well and trimmed properly to the wind,
it will lose power when you sheet out.
IF.. you at first had your kite set-up with too much back line tension
( causing it to stall / lose power ),
when you try to sheet-out, you are essentially letting off the brakes, and
allowing your kite to gain "lift". This WILL create power.
Kites , windsurfers, and Sailboats are NOT like cars.
In a car, foot off the gas.. less power ( EVERY TIME ).
Foot to the floor.. max power ( EVERY TIME ).
With a kite, there is a point of diminishing returns.
If you're lines are slack.
Pull in and you get more power.
Pull in too much and you lose the power and lift ( Stall ).
That's the basics, but there is more to it than described above.
You can learn more about Sheeting, lift, drag, angle of attack, or you can
learn to feel it. We strongly recommend that you learn it from both sides.
Practice and feel, and also understand how and why it works ( to some degree).
The beauty of a sheetable ( depowerable ) kite is when you get hit by a strong wind gust, and want to spill off some of the power, you ust allow your control-bar to slide out a few inches / away from your body.
Sheetable foils and Inflatables function in the same way:
Bar-In = Sheeting In = More power or if excessive can cause Stall.
Bar-Out = Sheeting-Out = Depower / Less Power.
Steering with a Control Bar is the same regardless if it's a 2, 3, or 4 line kite,
Just like a mountan-bike...., or Left Left
Right Right: Pull Right and the kite Turns Right. ,
Left Left: Pull Left, and the kite Turns Left.
Choosing a Kite Size
The Kite size used for the snow varies considerably! On a day with 15 knots of wind, people can be Snow-Kiting with kites ranging from 3m to 13m!
Considerations / Factors
- Wind Speed: as measured with a wind meter / anemometer.
- Air Density: affected by altitude, Temperature, and Humidity
- Snow Conditions: Icy and slick, hard-packed, slushy, powder or deep powder.
- Rider Weight and strength: From 50 lb kids to 250 lb giants.
- There's a kite for everyone.
- Type/ Design of Kite: High vs Low aspect design, Standard foil, or Sheetable.
- Rider Skill: Beginner, Intermediat,
- Advanced Rider Style and Goals: Cruiser, technical rider, to big air junkies.
Here Are Some Tips
If you have Zero previous kite experience...
We recommend starting out with a "Trainer Kite"
Small entry level Snow kite: 3m to 5m range Good for the stronger winds in normal snow conditions or on lighter days with hard packed conditions. Example: Scout 3-line kite
Medium Size Snow Kite: Medium " Sheetable Foil" One Kite for variety of riders and conditions would be around 7m to 9m.
or Medium "Inflatable Kite" 9m or 11m or so.
Large Snow kite: 11m to 15m or larger for light winds.
Kite Quiver:
For people serious about maximizing the fun-factor in all conditions..
Many Snow-Kiters eventually end up with 2 to 3 kites of different sizes for Light, Moderate, and Strong winds.
Examples:
Inflatables 9m + 13m, or 7m +11m,
or a foil kites: 8m + 11m

It you're going to split the purchase and get one kite now ,,,
Get the smaller kite first! It's safer!
**** Sizes are approximate. The actual size or sizes you choose will depend on Weight, snow conditions, local winds, experience level etc. specific Brand and Model.
Questions? We're always happy to help... just ask! : ) Contact Us
Where to ride: Snow-Kiting Locations.
The best locations are wide open mountain passes, and frozen snow covered lakes, at high elevations where the wind blows freely with minimal obstructions. Tall Trees, large Buildings and houses can all block the flow of wind and force it to become gusty and shifty. Ideally you are looking for wind that is consistent as possible in both direction and strength.
A few of the many well known US kite spots:
Lake Dillon, Summit County Colorado
Skyline, Near SLC Utah
Georgetown Lake, Montana
The best locations are still waiting to be discovered.
No need to snow-kite in the perfect location. Kiting in any open field
beats sitting in the house and dream about ideal spots.
As long as the area is safe, get out there!
Snow-Kiting Lessons
Lessons are always a good idea, and a great way to save time and money. Snow-Kiting is super easy to learn with a couple of lessons from a good instructor. Like any sport, you can learn via the school of hard knocks, aka "suicide on a string", or you can take a lesson and save yourself unneeded frustration.
I still remember the 1st time I tried snowboarding, crash... crash... crash. The 2nd attempt was with an instructor-friend who told me to drag my knuckles. The crashing stopped, and in about 5 minutes, and I was riding and doing surface 360's down the hill while pivoting off my knuckles planted in the snow.
I'm sure at the time, I was thinking to myself ...
"You dummy, why didn't you take a lesson the 1st time out!"
For many people reading this, you already have the board-skills, and now need to learn about:
- Kites
- Wind Effects: Venturi, Turbulence, etc.
- Weather: Forcasts and ready the sky.
- Wind orientation: riding angles, going "up-wind",
- Launching, Landing, re-launching with an assistant and by yourself.
- Understand and practicing with your safety systems.
- Kite tuning / Adjusting
- Harness use: hooking in to the trim-loop vs fixed loop,
- Emergency and self rescue
- Riding: Transitions, jumping, Kite etiquette,
- Choosing the right gear, etc.
The best way to begin, just like other kite-sports, is to begin with a trainer kite.
Use the info on the instructional DVD, and then progress using a harness, riding on the snow, and using larger more powerful kites.